A pool gate can look closed while its latch is barely catching. That small gap can turn a family pool area into an unsafe access point.
Pool gate repair should restore one simple behavior: after every opening, the gate swings shut and latches without a hand guiding it. Salt air, settling pavers, and worn hardware can disrupt that behavior, even after a screen project or pool renovation.
Use this checklist before making adjustments, then get help when gate damage or code questions go beyond a basic inspection.
Pool Gate Repair Starts With the Barrier Rules
A pool access gate is safety equipment, not an ordinary yard door. First, confirm which fence, enclosure wall, or gate forms the required pool barrier. Keep planters, furniture, toys, and equipment away from it, since climbable objects can defeat an otherwise sound barrier.
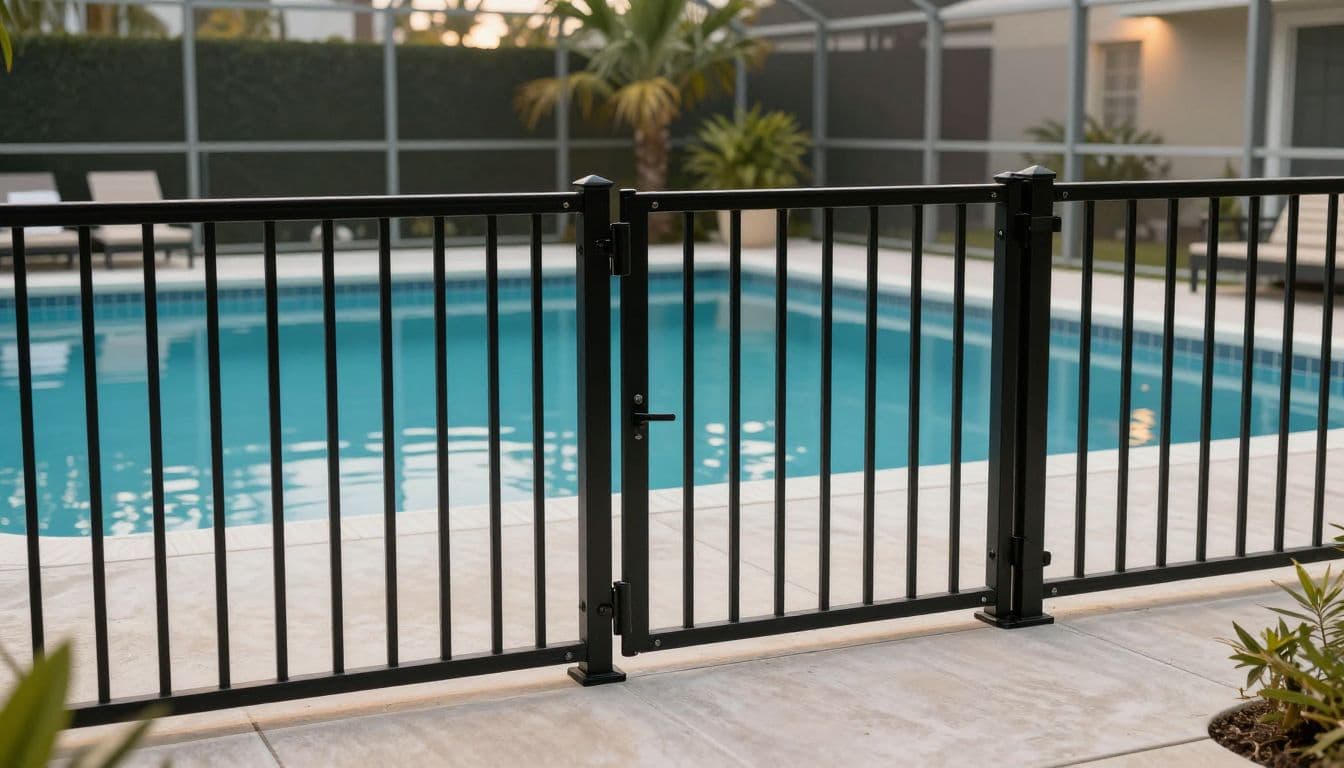
Under Florida Statutes section 515.29, a residential pool barrier must be at least 4 feet high. Gates that provide pool access must open outward, away from the pool. They also must self-close and self-latch, with the release mechanism on the pool side and beyond a young child's reach.
Those are statewide rules. Cape Coral may have added permitting and inspection details, so check current local requirements before changing a barrier. Since March 1, 2026, the City of Cape Coral has treated pool safety barriers as a separate permit reviewed and inspected independently from the pool permit.
Keep the gate in service safely
Never prop a pool gate open, bypass its latch, or disable a self-closing hinge because the gate feels inconvenient. If it won't close and latch on its own, keep it secured and prevent unsupervised pool access while you arrange a repair.
A gate that closes only when someone gives it a final push isn't working as intended.
Test Closing and Latching From Every Position
Keep children and pets away from the pool area while you test the gate. Start by looking for obvious obstructions such as leaves, patio furniture, deck mats, loose screen, or landscaping that contacts the gate's swing path.
Run a repeatable closing test
Open the gate in its normal direction, then release it without pushing it toward the latch. Test it from several positions, including nearly closed, about one-quarter open, halfway open, and near its full travel if the manufacturer permits that swing range.
Use the same sequence each time:
- Release the gate and watch whether the hinges or spring carry it all the way to the latch.
- Confirm that the latch engages fully, rather than resting against the striker plate.
- Without touching the release, pull gently in the opening direction to check that the latch holds.
- Repeat the test at least twice from each position, because a gate that works once can still bind intermittently.
A reliable gate closes and latches every time. If wind affects the test, repeat it when conditions are calmer, then follow the hardware manufacturer's instructions for acceptable operation.
Check the latch, not only the swing
Listen for a click, but don't treat sound as proof. Look closely at the latch pin or catch. It should seat fully without rubbing, skipping, or needing manual help.
A latch that catches only on its edge can release when the gate shifts or someone pushes on the lower rail.
Also check that the outside of the gate doesn't offer a child an easy way to reach or manipulate the release. Barrier designs, latch placement, and allowable gaps must match the approved local requirements for your property.
Inspect Hinges, Springs, Alignment, and Corrosion
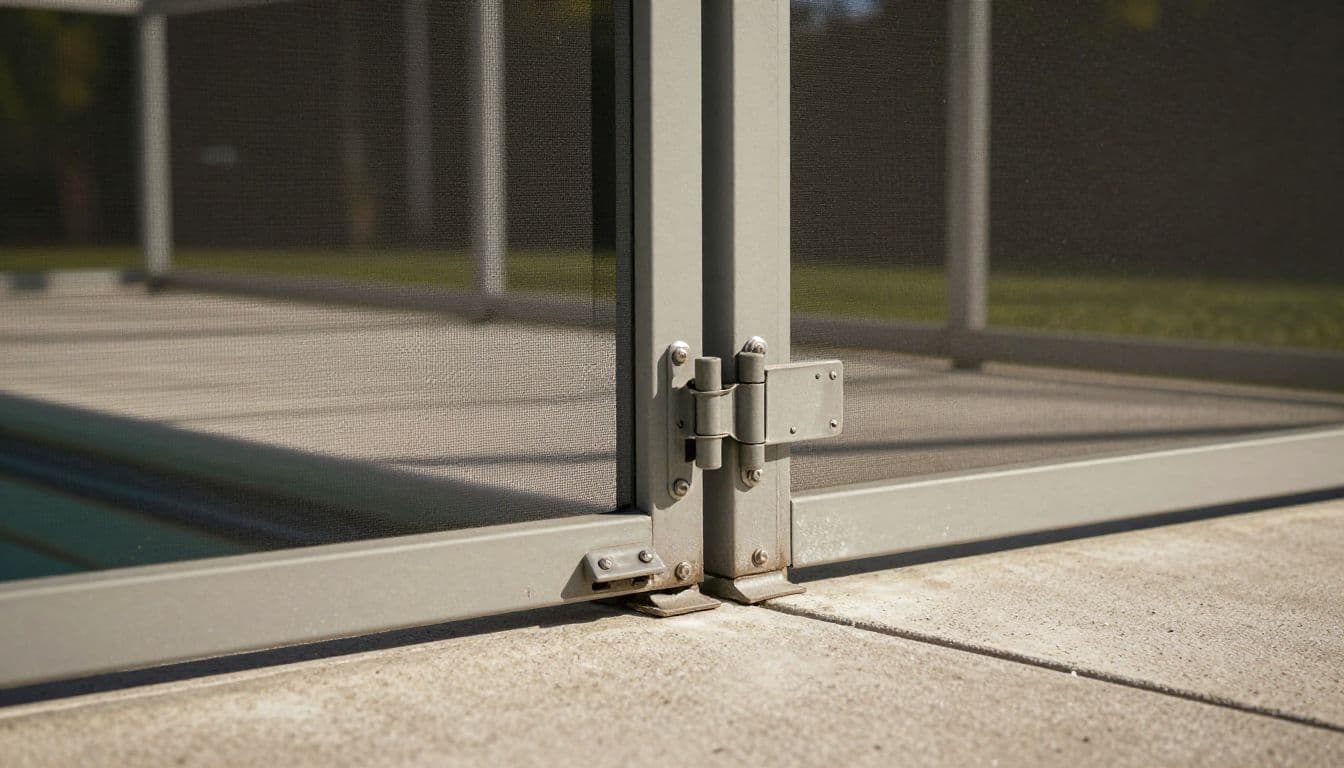
Self-closing trouble often begins at the hinge side. Examine hinge bodies, spring housings, mounting screws, and gate posts for rust, pitting, cracked parts, loose fasteners, or white oxidation on aluminum.
Watch for lost closing force
A gate that drifts shut slowly, stops short, or stays open may have a worn or damaged self-closing hinge or spring. Coastal moisture can speed up corrosion, especially where dissimilar metals meet.
Use only the maintenance steps, lubricants, replacement parts, and tension settings approved by the hinge manufacturer. Don't guess at spring tension, drill new mounting holes, or swap latch parts because they appear similar.
Look for sagging and latch misalignment
A sagging gate may drag across the deck, scrape a post, or leave an uneven gap at the latch side. It can also close below or above the striker, which prevents dependable latching.
Check for a shifted post, loose frame connection, cracked weld, settling deck surface, or a gate panel that no longer hangs square. If the gate is part of a pool cage, a sticking door can point to broader frame wear. Pool screen enclosures and rescreening can address related enclosure issues before they affect access and safety.
When to Call a Qualified Pool Barrier Professional
A simple obstruction may be easy to clear. However, a pool gate repair job needs professional attention when the gate post moves, the frame is bent, hardware has failed, or the gate still misses the latch after approved adjustments.
Call a qualified professional for:
- Cracked or damaged tempered glass, gate replacement, broken welds, or structural post damage.
- Electrical components, powered locks, alarms, or wiring near the gate.
- Corroded enclosure framing, unstable footings, or damaged mounting surfaces.
- Any uncertainty about local pool-barrier codes, permit requirements, or inspection approval.
Cape Coral requires required safety barriers to pass inspection before a structural pool final can be completed. That matters after resurfacing, new pavers, enclosure work, or other renovations that change gate clearance or alignment.
For help evaluating a gate area as part of a pool, deck, or enclosure project, Get a Free Estimate for an on-site consultation.
A Gate Must Close on Its Own Every Time
Pool gate repair is complete only when the gate closes, latches, and stays secured without help from the person who opened it. Cosmetic improvements don't make up for weak springs, misaligned latches, or corroded hardware.
A dependable gate protects the pool area every time someone passes through it. Treat a failed closing or latching test as a safety issue, then correct it under the manufacturer's instructions and current local requirements.